

Taking a handwritten signature, or anything handwritten for that matter, and converting it for use in your digital files can be something handy to know.
The other day I was experimenting with a watercolor Photoshop action that converted a photo into a painting. I liked the results of the action and wanted to top it off with more of an artsy signature than my normal “Dub” logo/watermark. That got me thinking, that if the signature was something that I would want to use over and over again, it would make sense to have it as a brush within Photoshop so that I wouldn’t always have to open a watermark file and paste it in.
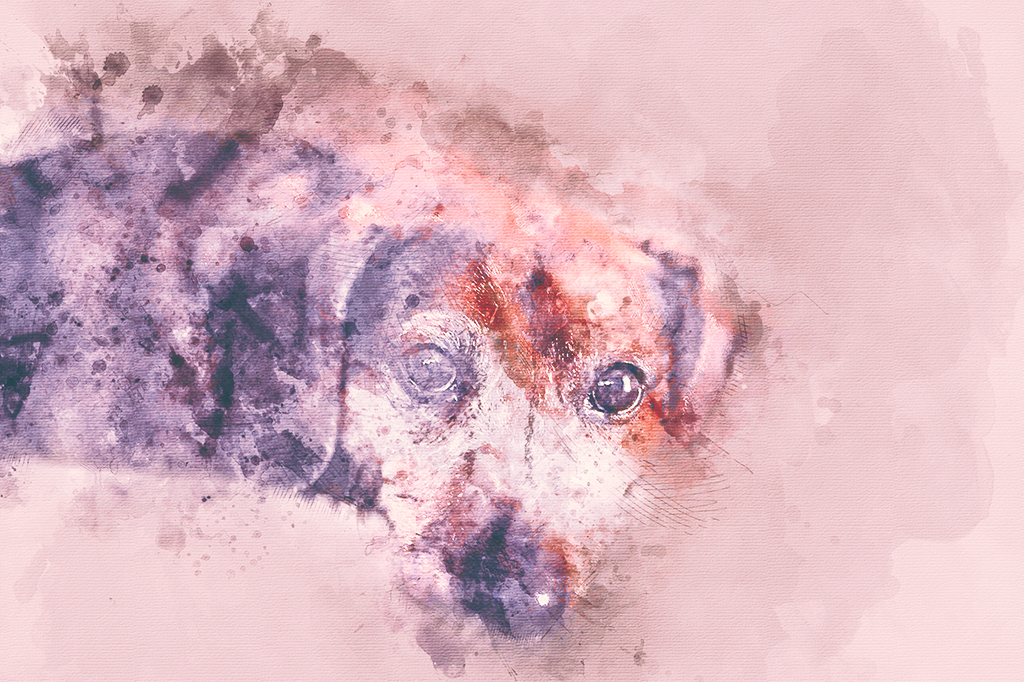
Anyway… Here is the image I was working with, converted over from a photo of my dog, Snoopie. ;-) On a side note, that was a pretty fun action to experiment with. You can grab a copy via Graphic River if you would like. For $6 it really isn’t bad at all. Normally I would want total control over the image, but watching this action run proved to me that there was no way I would want to go through all of those steps every single time!
The greatest thing about this process is that you don’t need any fancy scanner or other equipment. You can create this with a pen and your cell phone. Grab a plain white sheet of paper and sign it. Using your phone, try and take the photo straight on without any shadows, if at all possible. What you are looking for is a dead on photo of the signature that you can bring into Photoshop and convert over to a brush so that you can use it over and over.
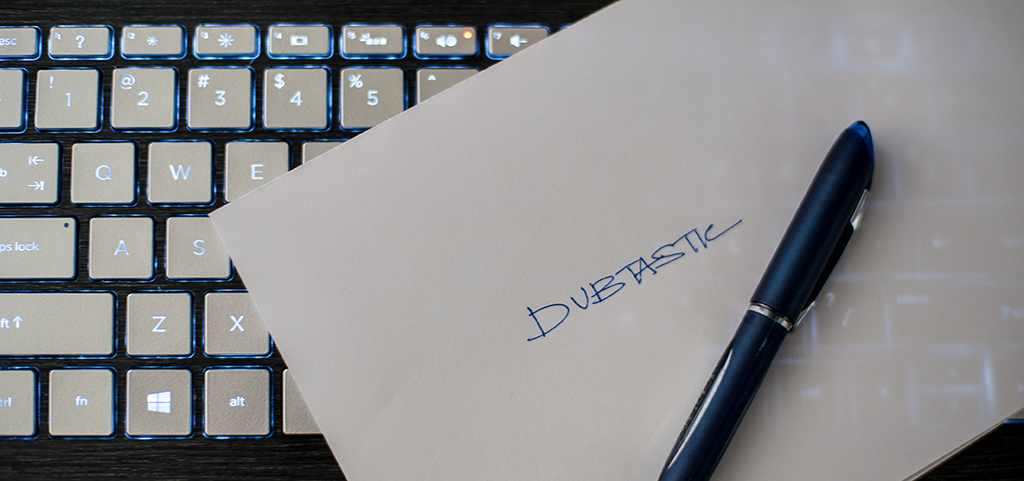
For the purpose of this example, I just wrote out “Dubtastic” on a plain sheet of paper.
Next, use your phone and take a photo of the signature and email it to yourself. Or if you are really fancy, break out the DSLR and upload the raw file to DropBox. However you want to capture the image and send it to yourself. The point here is that you don’t need a DSLR and can accomplish this with just a cell phone.
With the signature file in Photoshop, convert it to black & white (Control + Shift + U or Image > Adjustments > Desaturate). You will notice that it isn’t as dark as you might want it, and that it is not isolated off the background. You will want this on an all white background to get the best result.
The quickest way to do this, would be to adjust the image threshold (Image > Adjustments > Threshold). When the control opens, you’ll see a drastic difference right away.
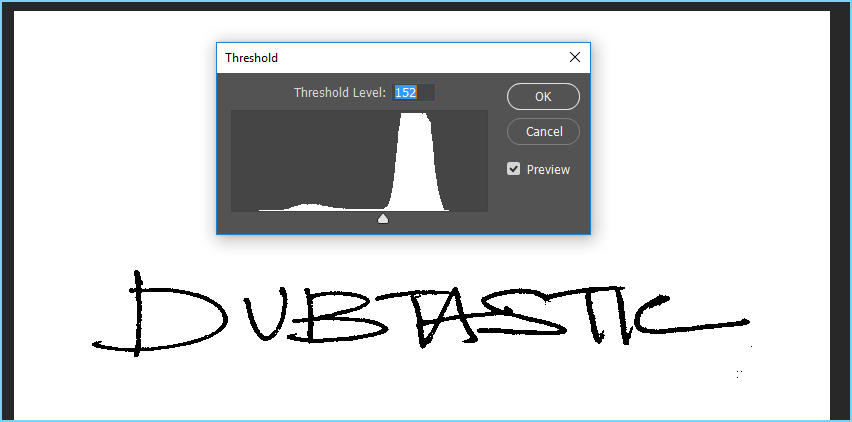
While the stroke of the signature looks a little rough, this is a really fast way to convert the image for use in a brush. When you zoom in, you’ll notice some smaller artifacts around the image. On my example, they are more present toward the bottom right of the image. This will all vary.
If this is too rough of a result for you, there are a couple of other ways to do this:
- You can use the Media Militia white background removal action set (download here). This is a great action set and awesome because it is free. I have used this countless times. There are times when it doesn’t give the exact result that I am looking for, so you might have to experiment with this to see if it works for you.
- Levels adjustments: With a similar process as adjusting the threshold, you can adjust the levels (Image > Adjustments > Levels) and move the sliders to see if that produces a smoother result than the threshold adjustment.
Once you have the effect you want, crop the image down as much as possible, so that only the signature is there and it is spanning edge to edge. Select the entire image (Control + A or Select > All from the menu). From the menu, select Edit > Define Brush Preset and give your new brush a name.
To access your new brush, hit the letter B on your keyboard to access the brushes and you should see it as the last brush.

Select your new brush and then it is free to use on your image.
With the brush being large enough, it is easy to scale. For my image, I needed it smaller. Use the brackets “[” and “]” to quickly size your brush up and down as needed.

With it being a brush, you can quickly adjust the color, opacity of the layer, etc. I like this method because it gives me more control over the final result.
Before you discard the signature file, you can extract the handwriting off the white background and use it as a transparent PNG if needed. These work great for creating watermarks within Lightroom. This is great if you are planning on doing batch watermarking to images and don’t want to hassle around with customizing the placement and color on each file.
You can try my new action for removing the white background:
https://www.photoshopsupply.com/actions/remove-white-background-photoshop